

Tutorials
How to Use Custom Keyword to Add Context in BizCrush
 BizCrush
5 min read
Get cleaner summaries when meetings use niche terms.
Product names, acronyms, internal project names — generic summaries miss these keywords.
Custom Keyword for Context lets you define meeting-specific keywords, so BizCrush produces topic-specific summaries and insights.
Here’s how it works 👇
Step 1: Open the Side Menu → Manage Keywords
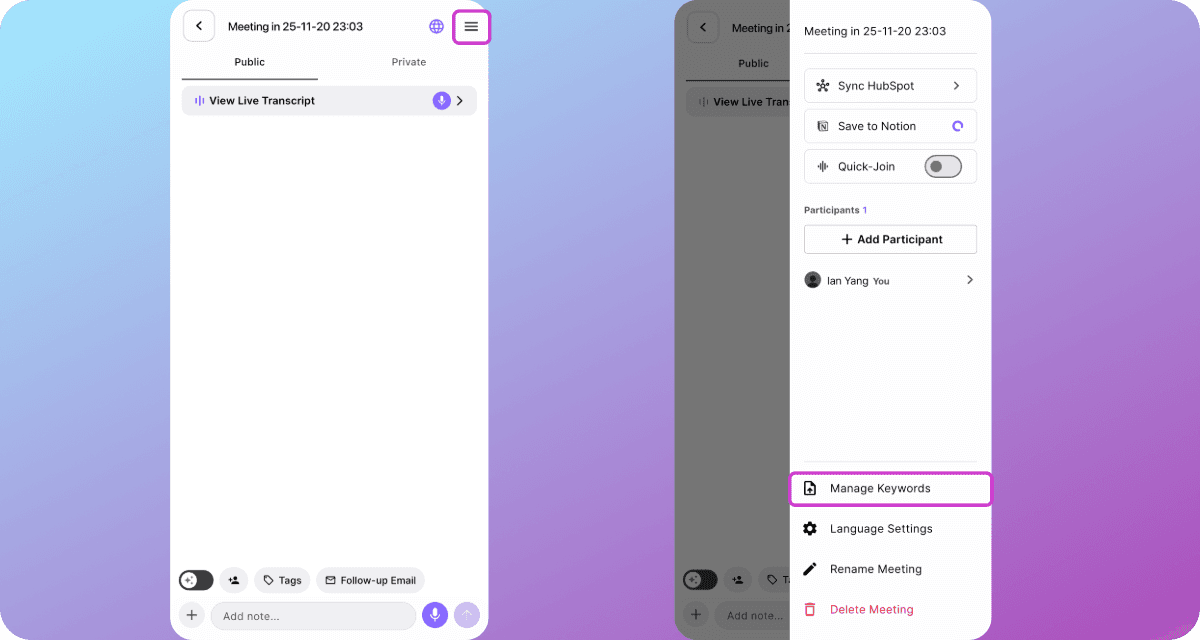
From the meeting, tap ☰ (top-right), then select Manage Keywords.
You can do this before or during a meeting.
Step 2: Choose how to add context (PDF upload or URL)
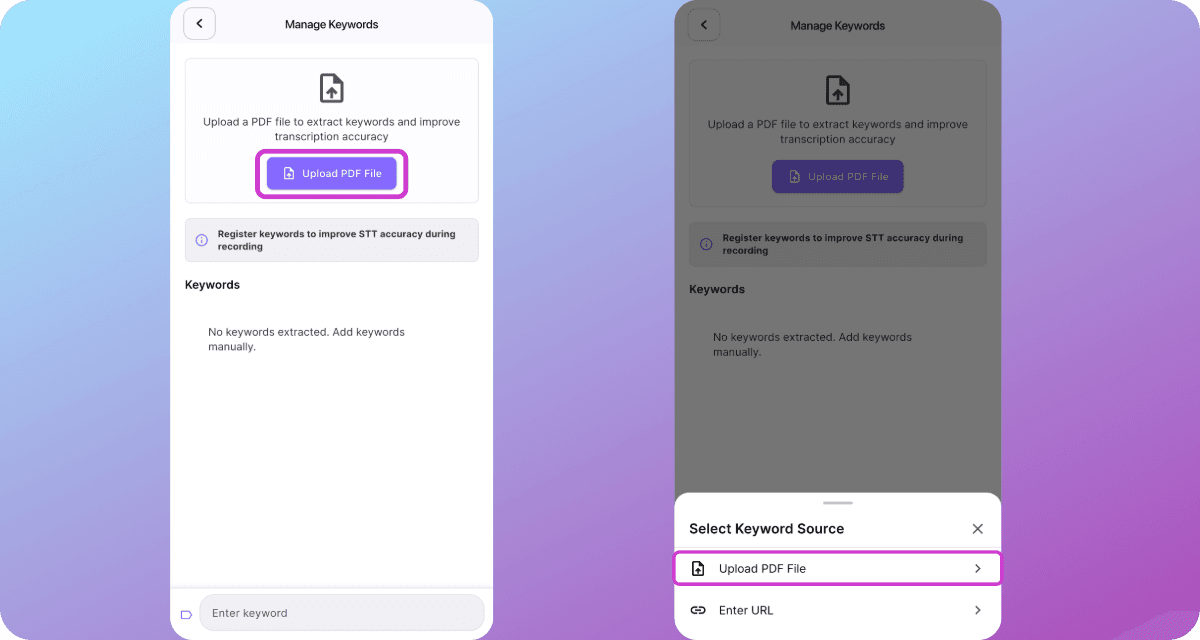
Add Context in two ways.
-
Upload PDF File (deck, spec, agenda, brief)
-
Enter URL (direct download links only)
Step 3: Add a document (Let BizCrush extract keywords)
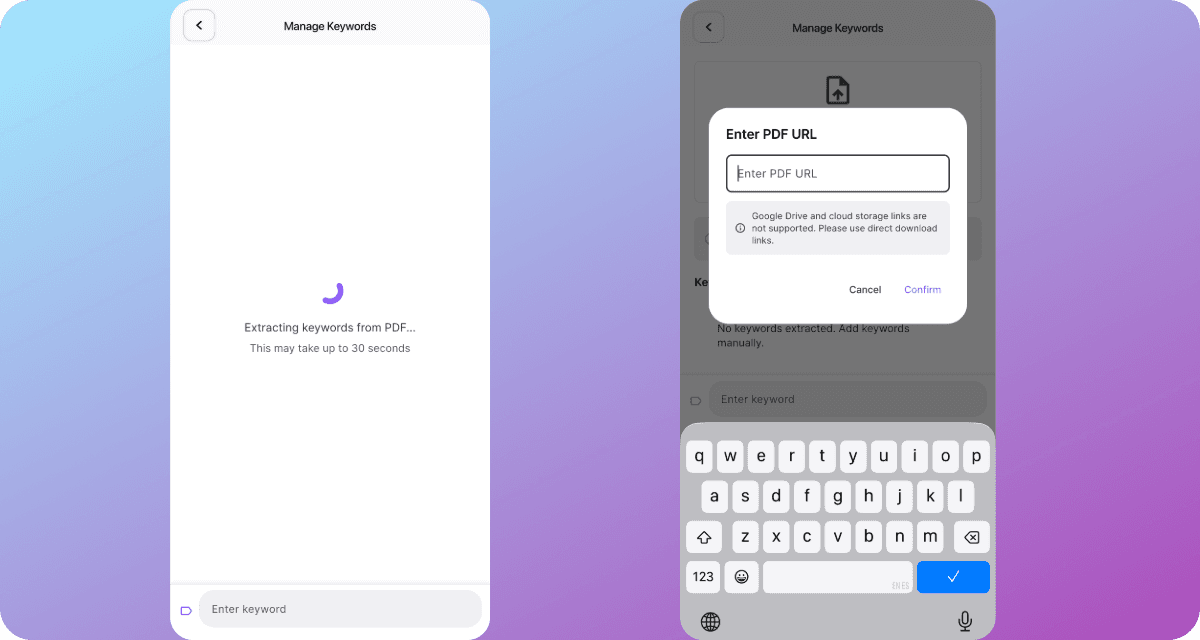
When you upload a PDF, BizCrush automatically extracts relevant keywords.
Using a URL?
- Paste a direct download link (cloud preview links may fail)
Step 4: Review and refine
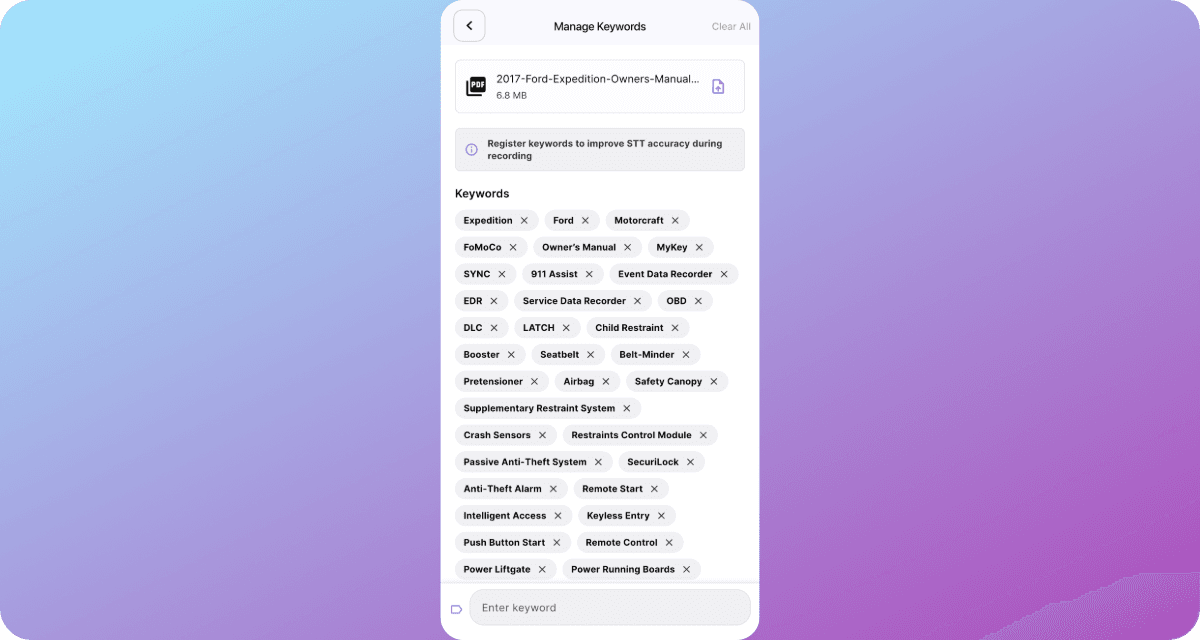
Extracted keywords appear as “Input Chips.”
-
Delete noise terms
-
Keep only what matters
-
Or Clear All and start fresh
Step 5: Add a custom keyword manually
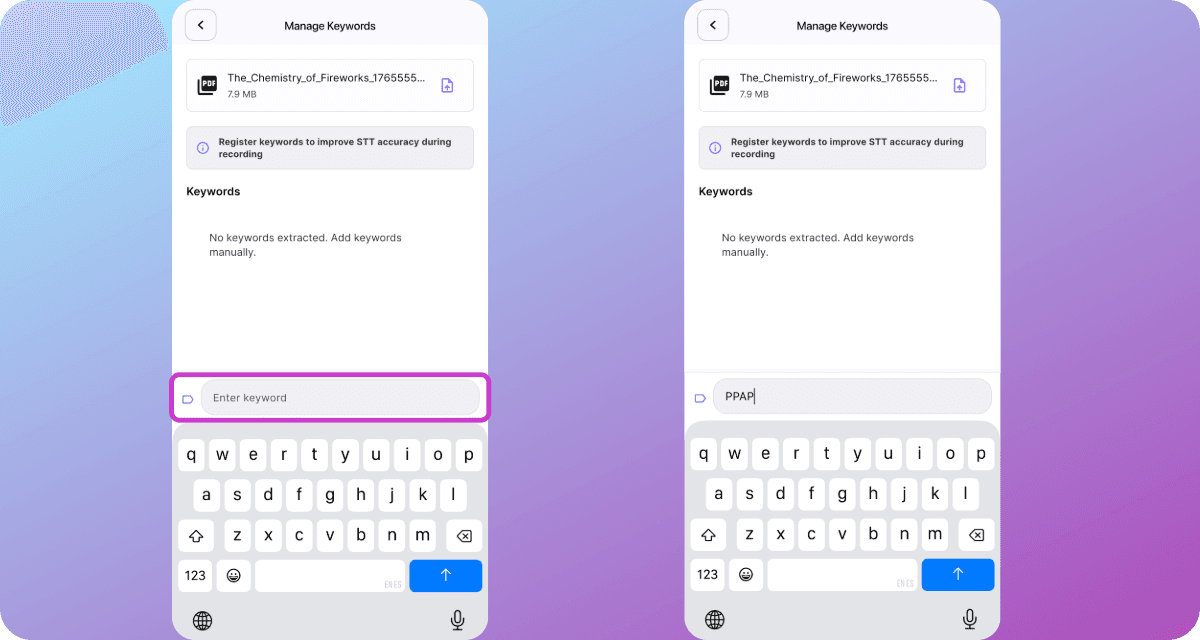
Have a specific term in mind?
-
Tap Enter keyword
-
Add project name, acronym, internal jargon.
For examples, Hubspot, NetSuite, Deepfilter, PRD
Step 6: Confirm
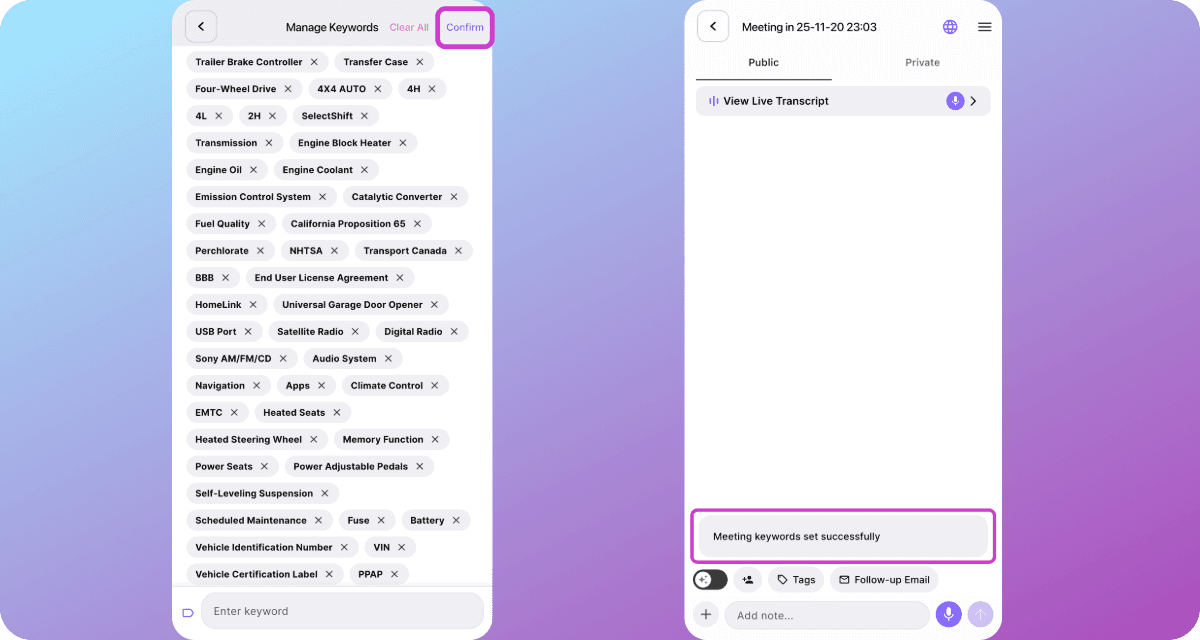
Tap Confirm in the top-right corner
BizCrush now uses these keywords to generate more accurate, context-aware summaries
Pro Tips
-
Prefer proper nouns over generic words. (e.g., “HubSpot,” “SOC 2,” “RFP,” “Series A,” “NetSuite”).
-
5–15 keywords beat a long list.
-
If summaries feel off, remove noisy keywords (or Clear All) and retry.
-
Update keywords between client meetings for best results.
TL; DR
-
☰ Menu → Manage Keywords
-
Add context via Upload PDF File /URL manual entry.
-
Review keywords → Confirm
Want to try this out?
Add custom keywords to your next meeting and see the difference.